 第三方登录 - Google
# 创建凭证
https://console.cloud.google.com/apis/credentials (opens new window)
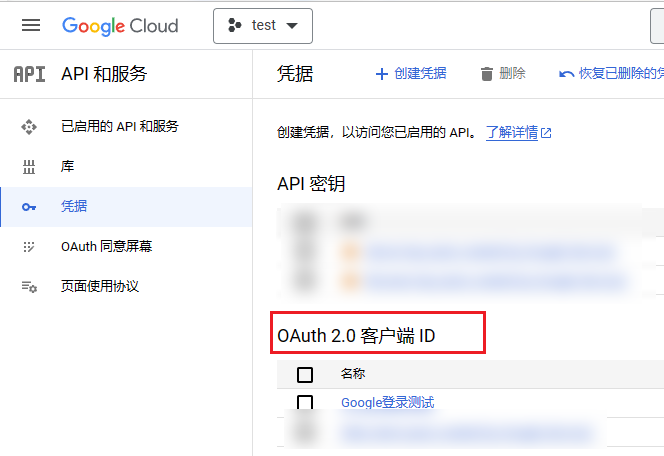
- 创建项目,即图中
test - 创建 OAuth 2.0 客户端 ID,复制客户端 ID 备用
- 配置回调地址
对于本地测试或开发,请添加
http://localhost和http://localhost:<port_number>,两个都要添加,否则弹窗授权会空白页。
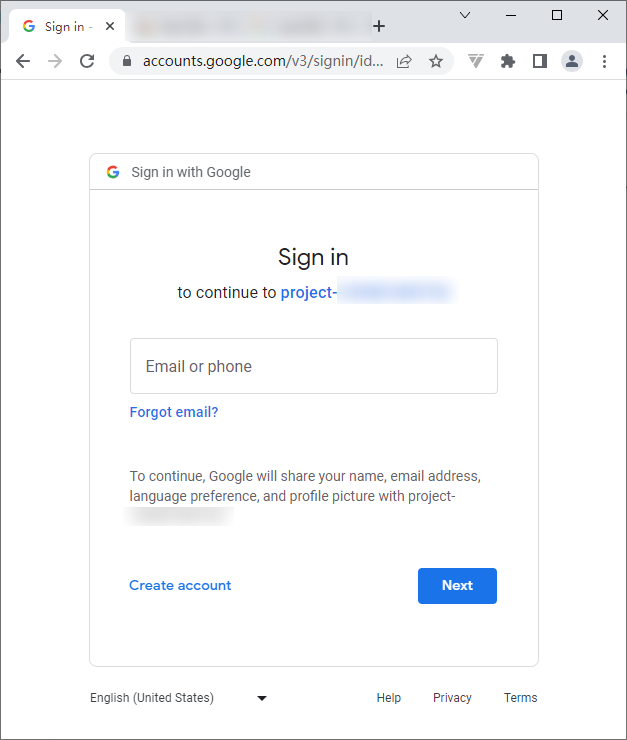
# Web 拉起授权
# 方式 1:跳转授权
参考:针对网络服务器应用使用 OAuth 2.0 | Authorization | Google for Developers (opens new window)
# 确定权限范围 (scope)
通常只需要用户的基本信息,即 https://www.googleapis.com/auth/userinfo.profile (这是一个标识,而不是要访问的地址)
更多可查看:适用于 Google API 的 OAuth 2.0 范围 | Authorization | Google for Developers (opens new window)
# 跳转授权
跳转到此网址
https://accounts.google.com/o/oauth2/v2/auth?response_type=code&client_id={客户端id}&redirect_uri={回调地址}&scope=https://www.googleapis.com/auth/userinfo.profile
授权成功会,会跳转到回调地址,并携带了 ?code=xxxxxxx
# code 转 token
curl --location --request POST 'https://oauth2.googleapis.com/token?client_id={客户端id}&client_secret={客户端密钥}&code={code}&grant_type=authorization_code&redirect_uri={回调地址}' \
# 方式 2:弹窗授权
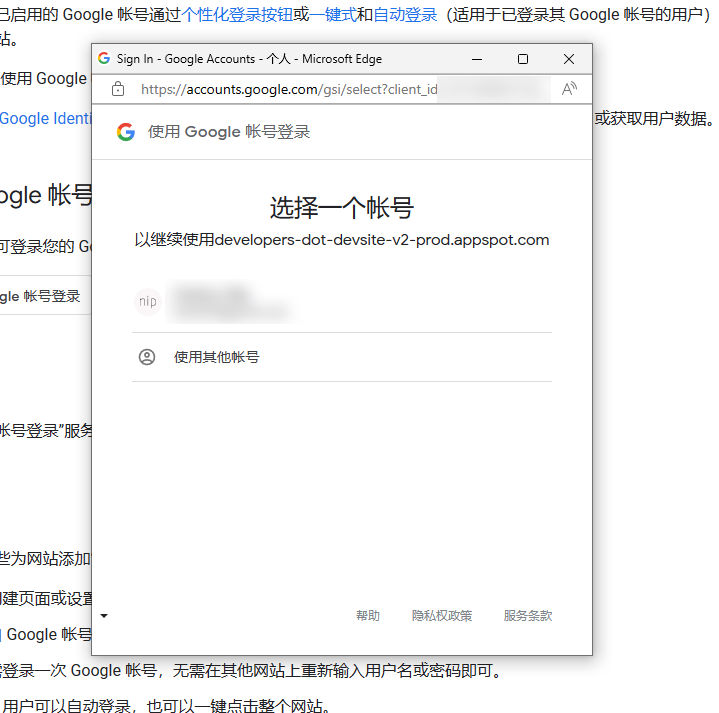
参考:概览 | Authentication | Google for Developers (opens new window)
# 前端拉起
todo
# 成功回调
当用户同样已授权后,会 POST 到回调地址,并在 body 中传递了 credential ,请其传递到后端。
# 后端校验
<!-- Google登录 -->
<dependency>
    <groupId>com.google.api-client</groupId>
    <artifactId>google-api-client</artifactId>
    <version>1.32.1</version>
</dependency>
 @Test
    void test() throws GeneralSecurityException, IOException {
        String idTokenString = "前端传来的credential(token)";
        String CLIENT_ID = "客户端id";

        HttpTransport transport = new NetHttpTransport();
        JsonFactory jsonFactory = GsonFactory.getDefaultInstance();
        GoogleIdTokenVerifier verifier = new GoogleIdTokenVerifier.Builder(transport, jsonFactory)
                // Specify the CLIENT_ID of the app that accesses the backend:
                .setAudience(Collections.singletonList(CLIENT_ID))
                // Or, if multiple clients access the backend:
                //.setAudience(Arrays.asList(CLIENT_ID_1, CLIENT_ID_2, CLIENT_ID_3))
                .build();

        // (Receive idTokenString by HTTPS POST)

        GoogleIdToken idToken = verifier.verify(idTokenString);
        if (idToken != null) {
            GoogleIdToken.Payload payload = idToken.getPayload();

            // Print user identifier
            String userId = payload.getSubject();
            System.out.println("User ID: " + userId);

            // Get profile information from payload
            String email = payload.getEmail();
            boolean emailVerified = Boolean.valueOf(payload.getEmailVerified());
            String name = (String) payload.get("name");
            String pictureUrl = (String) payload.get("picture");
            String locale = (String) payload.get("locale");
            String familyName = (String) payload.get("family_name");
            String givenName = (String) payload.get("given_name");

            // Use or store profile information
            // ...

        } else {
            System.out.println("Invalid ID token.");
        }

    }
// Make sure to add code blocks to your code group
# 参考资料
上次更新: 2024/03/11, 22:37:05